Achieving a level 5 plaster finish is the gold standard in the construction and painting industry, providing a smooth, flawless surface that minimizes visible imperfections. This high-quality finish is essential for areas where critical lighting, high-sheen paints, or dark colors are used, as these conditions can highlight even the smallest surface blemishes.
What Is Level 5 Plaster Finish?
A Level 5 plaster finish is the highest standard of surface preparation used in plasterboard finishing. It involves additional steps beyond the typical level 4 finish to ensure the smoothest, most uniform surface possible, which is crucial in environments with high visibility or demanding aesthetic requirements. This finish is especially recommended in spaces where critical lighting conditions, such as low-angle or spot lighting, can cast shadows that reveal surface imperfections. Additionally, it is ideal for feature walls or areas where high-sheen paints or darker colors are used, as these finishes tend to accentuate flaws.
In comparison, a level 4 finish, while sufficient for general interior spaces, is not as refined and is more likely to show blemishes under high-gloss paints or in areas with intense lighting. A level 5 finish is specifically designed to provide an impeccably smooth appearance, reducing the chance of visible imperfections and ensuring a more polished, professional look.
Requirements for a Level 5 Finish
Achieving a Level 5 plaster finish requires meticulous planning, collaboration, and execution by a team of professionals. The process demands cooperation between designers, builders, plasterers, and painters, as each stage of the project influences the final surface quality. Without this coordination, the end result may not meet the high standards of a level 5 finish.
Collaboration Between Professionals: The importance of cooperation cannot be overstated. The framing must be precise, the plastering must be flawless, and the painting must be executed with high-quality materials. A seamless flow of communication between all parties is critical to ensure that no step in the process compromises the finish.
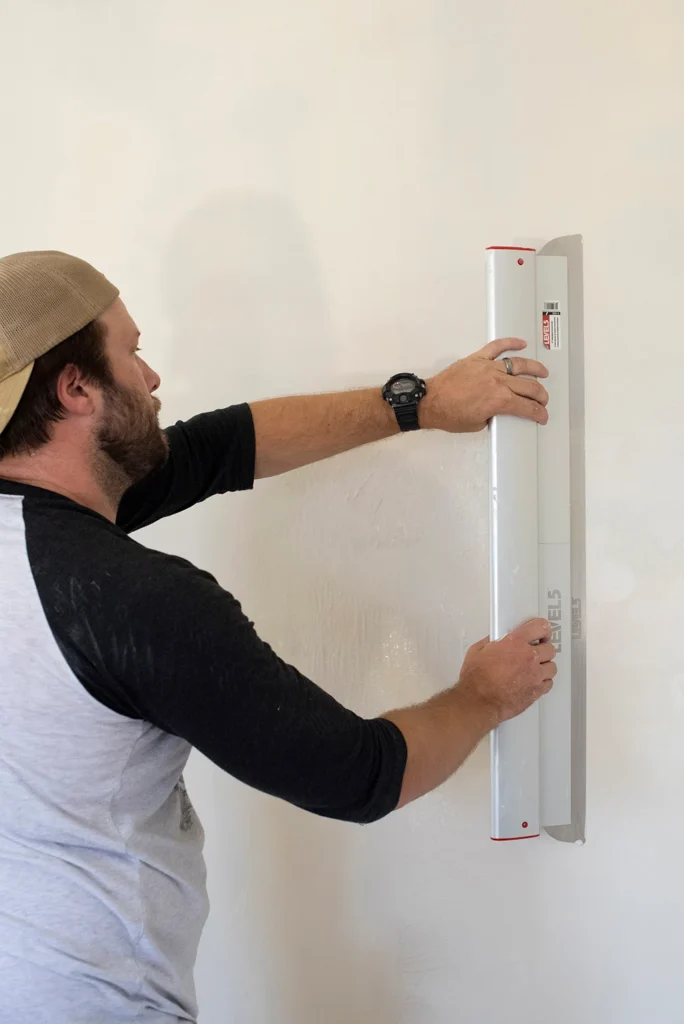
Surface Preparation: The success of a level 5 finish begins with proper surface preparation. Achieving framing tolerances of 3mm over a 1.8-meter straight edge for 90% of the surface ensures that the base for the plaster is even. Any deviations in framing will affect the final appearance, making imperfections more noticeable.
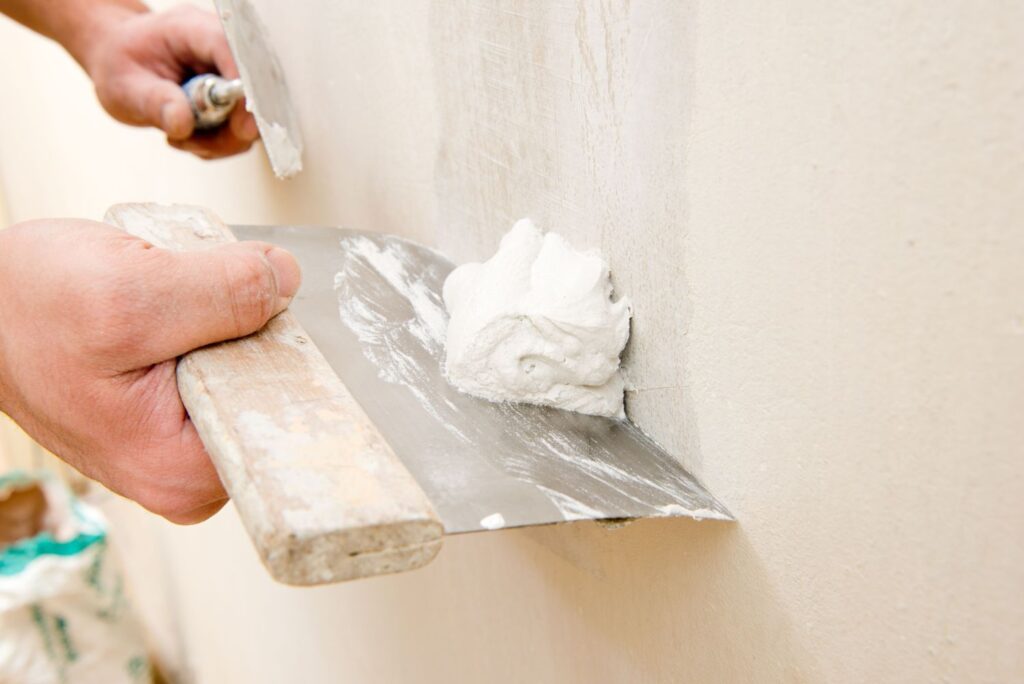
Jointing Process: The jointing process for a level 5 finish involves a three-coat system where joint cement or compound is applied to all joints, angles, and fastener heads. This is a key step in ensuring that the surface is smooth and uniform. Any unevenness in the jointing can lead to visible lines or ridges once the painting process begins.
Achieving the Perfect Level 5 Finish
Achieving a flawless level 5 plaster finish requires both the correct materials and application techniques.
Plaster Application Techniques: A specialty plaster material is typically trowelled over the surface to create a uniform base. This application needs to be done with precision to ensure no ridges or tool marks remain. The plaster is then extensively sanded to achieve a perfectly smooth surface, ready for painting. According to industry experts, the average time spent on sanding for a level 5 finish can be 30% longer than for a Level 4 finish due to the finer detail required.
Preparation and Sealing: Before applying paint, the surface must be thoroughly cleaned. This involves removing all dust, debris, and contaminants that could compromise the adhesion of the paint. Any residue left on the surface can lead to imperfections once the paint is applied. After cleaning, the surface should be sealed with a high-quality prepcoat. This sealing step is critical as it ensures that the subsequent coats of paint adhere properly, reduces uneven absorption (often known as “suction”), and helps prevent issues like gloss banding.
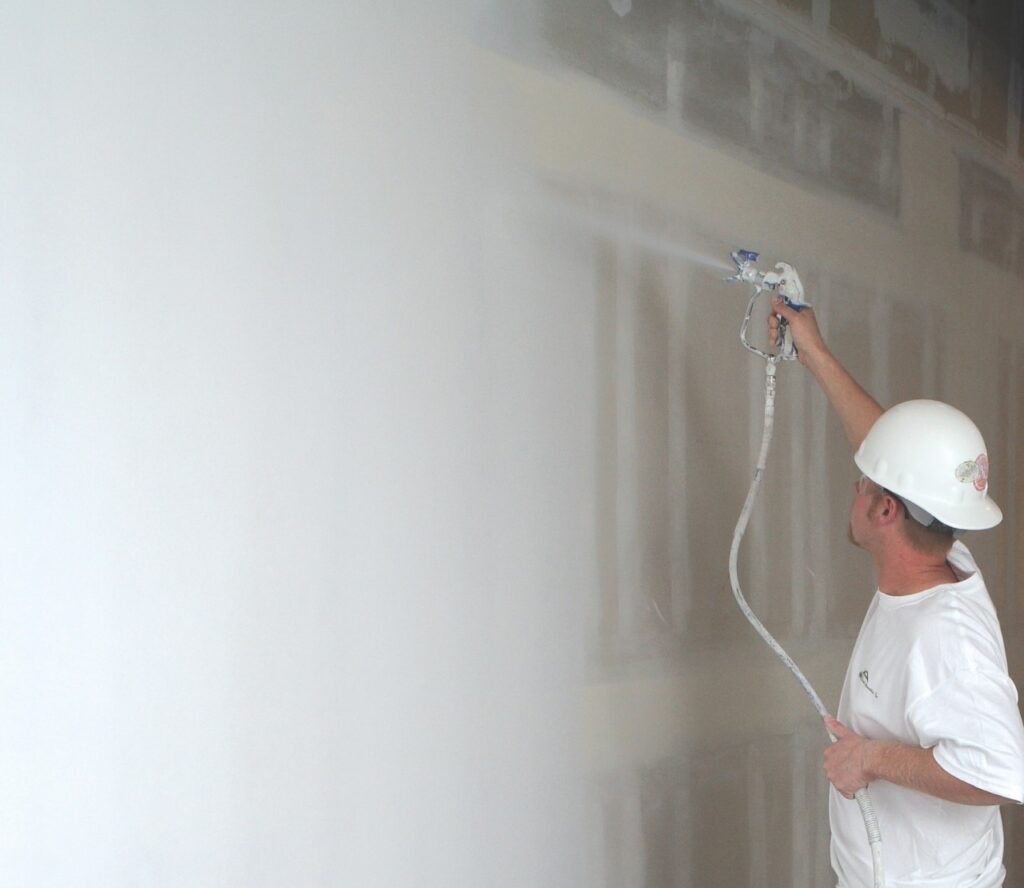
Specialty Paint Approach: To complement the plaster, the best paint for level 5 finish must be used. A high-quality primer/surfacer, such as an acrylic sealer or a primer/surfacer like Dulux Ultra 5 Surfacer, is applied either by spray or roller. This specialized primer is essential for creating a smooth base that can withstand detailed sanding before the final decoration stage. Applying the primer at high film thickness ensures that the surface imperfections are minimized, creating a flawless finish.
After the application of the primer, detailed sanding is performed again to further refine the surface. This step is critical in ensuring that the plasterboard is perfectly smooth before the final coats of paint are applied. The final decoration, whether it’s low-sheen or high-sheen paint, requires careful application to achieve the desired result. With darker colors or glossy finishes, the importance of selecting the best paint for level 5 finish becomes even more critical, as any imperfections will be magnified.
Three-Coat Paint System: For the best results, a three-coat system is recommended according to AS/NZS 2311:2009 standards. The first coat, known as the prepcoat or primer, serves to seal and smooth the surface. This is followed by two topcoats to provide the final decorative finish. For a Level 5 plaster finish, it is recommended to use low-sheen or pastel-colored paints, as these are less likely to highlight surface imperfections. High-sheen or darker colors can accentuate even minor blemishes, so if these colors are used, the quality of the finish becomes even more critical.
The best paint for level 5 finish is one that provides a uniform texture and minimizes the appearance of surface defects. Acrylic paints are commonly used, and their application must follow strict guidelines to achieve the intended smooth and flawless appearance.
Standards and Best Practices
To ensure the highest quality results for a Level 5 plaster finish, strict adherence to industry standards is required. These standards guide every aspect of the process, from surface preparation to the final coat of paint, ensuring the finish meets both aesthetic and durability expectations.
Australian Standards (AS/NZS 2589:2007 & AS/NZS 2311:2009): Following the guidelines outlined in the Australian Standards for plasterboard application (AS/NZS 2589:2007) and painting (AS/NZS 2311:2009) is crucial. These standards detail the correct jointing methods, surface tolerances, and painting procedures, ensuring each stage of the process is executed to the highest level.
By rigorously implementing the Australian Standards (AS/NZS 2589 and AS/NZS 2311), Colour House ensures that every step, from surface preparation to final paint application, follows best practices. Colour House prioritizes quality control, ensuring that the jointing, plastering, and painting stages are all completed in accordance with these standards, resulting in a finish that meets customer expectations for smoothness and durability. Colour House also provides guidance on using the best paint for level 5 finish, offering expert recommendations to achieve a flawless final result.
Conclusion
While the cost of a level 5 finish is higher than that of a Level 4 finish, the investment is justified by the results. The finish not only enhances the smoothness of walls but also ensures a uniform appearance, which is critical in modern architectural designs that focus on clean lines and minimalism.
When it comes to executing a level 5 finish, Colour House is one of the leaders in the industry, known for adhering to the highest standards and delivering impeccable results. By choosing Colour House, clients are not only assured of a top-tier Level 5 plaster finish but also benefit from expert guidance on selecting the best paint for level 5 finish, ensuring the walls or ceilings maintain their flawless appearance for years to come.


